Skip to content

DIY Pizza Oven Kits

Filters

  • Save $550.00 Save $0.00

    Chicago Brick Oven 750 DIY Wood Fired Pizza Oven Kit

    Chicago Brick Oven
    Original price $3,699.00
    Original price $3,699.00 - Original price $3,699.00
    Original price $3,699.00
    Current price $3,149.00
    $3,149.00 - $3,149.00
    Current price $3,149.00

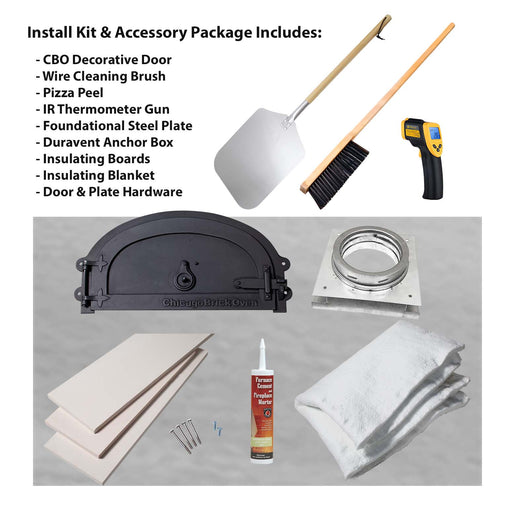
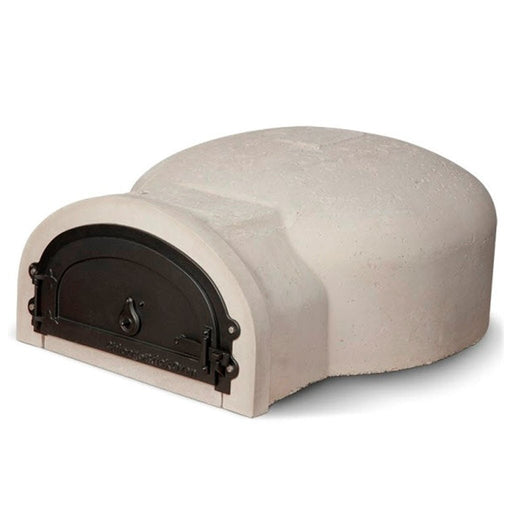
    Chicago Brick Oven 750 DIY Wood Fired Pizza Oven Kit For entertaining any size crowd, the CBO-750 DIY Wood Fired Oven Kit is the perfect choice. De...

    View full details
    Original price $3,699.00
    Original price $3,699.00 - Original price $3,699.00
    Original price $3,699.00
    Current price $3,149.00
    $3,149.00 - $3,149.00
    Current price $3,149.00
    Save $550.00 Save $0.00
  • Save up to $1,300.00 Save $0.00

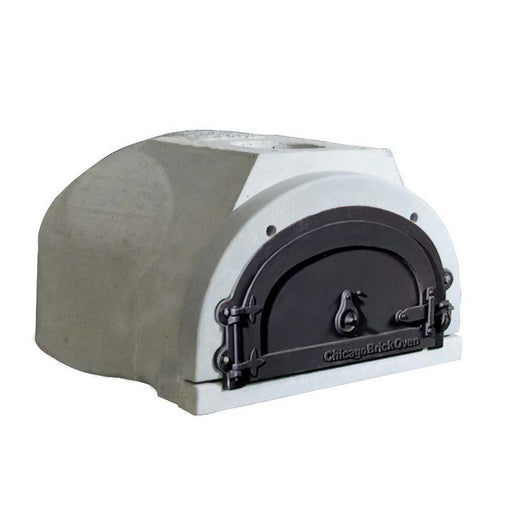
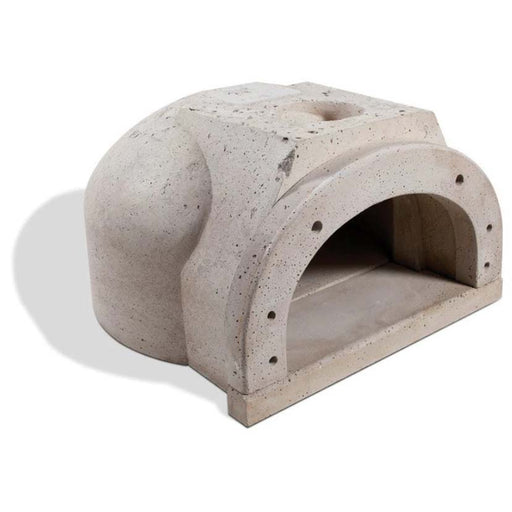
    Chicago Brick Oven 750 DIY Hybrid Wood and Gas Fired Pizza Oven Kit

    Chicago Brick Oven
    Original price $8,149.00 - Original price $8,299.00
    Original price $8,149.00 - Original price $8,299.00
    Original price $8,149.00
    $6,899.00 - $6,999.00
    $6,899.00 - $6,999.00
    Current price $6,899.00

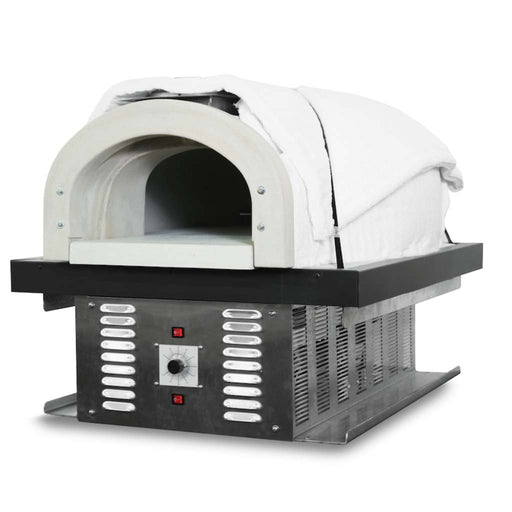
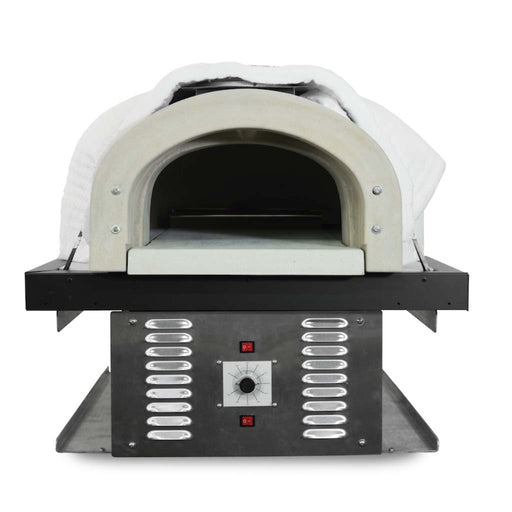
    Chicago Brick Oven 750 DIY Hybrid Wood and Gas Fired Pizza Oven Kit If you are looking for quick heating, the CBO-750 Hybrid DIY Pizza Oven Kit ove...

    View full details
    Original price $8,149.00 - Original price $8,299.00
    Original price $8,149.00 - Original price $8,299.00
    Original price $8,149.00
    $6,899.00 - $6,999.00
    $6,899.00 - $6,999.00
    Current price $6,899.00
    Save up to $1,300.00 Save $0.00
  • Save $400.00 Save $0.00

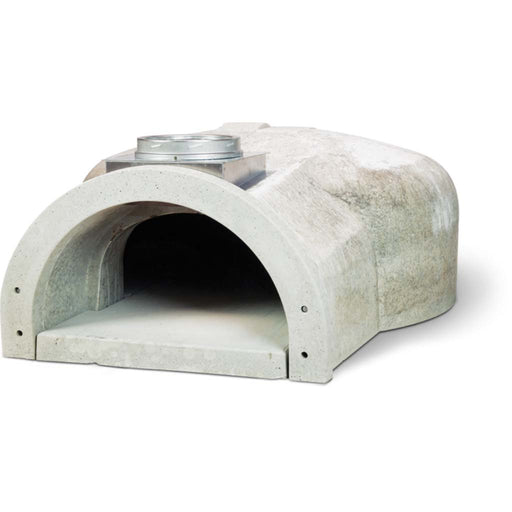
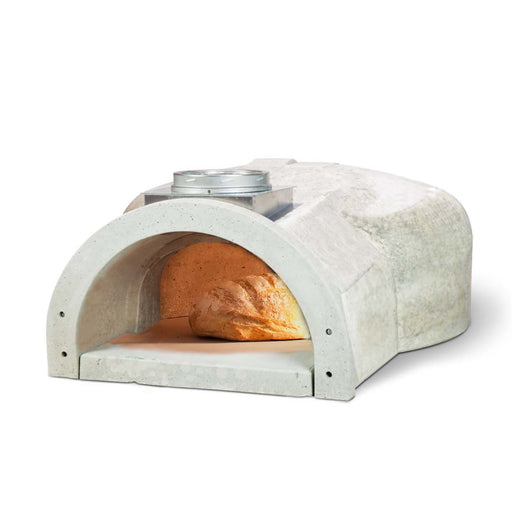
    Chicago Brick Oven 500 DIY Wood Fired Pizza Oven Kit

    Chicago Brick Oven
    Original price $3,099.00
    Original price $3,099.00 - Original price $3,099.00
    Original price $3,099.00
    Current price $2,699.00
    $2,699.00 - $2,699.00
    Current price $2,699.00

    Chicago Brick Oven 500 DIY Wood Fired Pizza Oven Kit  The CBO-500 Outdoor Pizza Oven DIY Kit is a great choice for layouts that require an oven wit...

    View full details
    Original price $3,099.00
    Original price $3,099.00 - Original price $3,099.00
    Original price $3,099.00
    Current price $2,699.00
    $2,699.00 - $2,699.00
    Current price $2,699.00
    Save $400.00 Save $0.00
  • Save $1,100.00 Save $0.00

    Chicago Brick Oven 1000 DIY Wood Fired Pizza Oven Kit

    Chicago Brick Oven
    Original price $9,099.00
    Original price $9,099.00 - Original price $9,099.00
    Original price $9,099.00
    Current price $7,999.00
    $7,999.00 - $7,999.00
    Current price $7,999.00

    Chicago Brick Oven 1000 DIY Wood Fired Pizza Oven Kit With over 2,000 square inches of cooking space, the CBO-1000 Commercial Pizza Oven DIY Kit is...

    View full details
    Original price $9,099.00
    Original price $9,099.00 - Original price $9,099.00
    Original price $9,099.00
    Current price $7,999.00
    $7,999.00 - $7,999.00
    Current price $7,999.00
    Save $1,100.00 Save $0.00

Ah, the enticing aroma of freshly baked pizza wafting through the air – it's hard to resist the comforting, mouth-watering experience of enjoying a homemade pie.

But have you ever considered taking your pizza-making game to the next level? Building a DIY pizza oven could be the perfect project to elevate your home culinary skills and make every pizza night a memorable one.

A DIY pizza oven not only provides an authentic, wood-fired taste to your pizzas but also serves as an impressive centerpiece for your backyard or patio. Constructing a pizza oven may seem daunting at first, but with a bit of planning, you'll find that it's a rewarding and achievable task. And the best part is, you don't necessarily need to burn a hole in your wallet to create the ultimate pizza-making machine.

Choosing A Pizza Oven Kit

When building a DIY pizza oven, it's essential that we select the appropriate materials to ensure a long-lasting, efficient, and safe construction. Let's dive into some of the key components needed for our pizza oven project.

First and foremost, bricks play a vital role in the construction. It's crucial to use high-quality firebricks, also known as refractory bricks, as they can withstand extreme heat and ensure a well-insulated cooking chamber. Standard bricks may not hold up against the high temperatures of a pizza oven, so opting for firebricks is the best choice.

Cement and concrete are commonly used to create the base structure for the oven. To guarantee longevity, we recommend using refractory cement, specifically designed to handle extreme heat. When building the foundation, a combination of concrete, rebar, and cinder blocks can help create a sturdy and level surface.

For added insulation, we might want to consider using vermiculite. Vermiculite is a lightweight material that provides excellent insulation properties. It can either be mixed with the cement or added separately in layers to reduce heat loss from the cooking chamber.

Assembling the oven's dome will require mortar that can withstand high temperatures. A suitable option is a mixture of sand, clay, and water. Remember to measure the correct proportions to achieve the desired consistency needed for stability.

Steel is another essential element in a pizza oven construction. We can use steel to create support structures, such as barrels or frames, to hold the weight of the oven. Steel can also be used to create the door and chimney for the pizza oven.

Lastly, if we choose to enhance the look of our pizza oven, we can use stones or exterior-grade lumber for veneering. Not only will this give our pizza oven an attractive appearance, but it'll also provide additional protection from the elements.

In summary, we need to carefully choose the right combination of materials, including firebricks, cement, concrete, sand, steel, vermiculite, clay, mortar, rebar, and potentially stones or exterior-grade lumber to build a durable and functional DIY pizza oven that will last for years to come.

Planning the Space

When planning the space for our DIY pizza oven, we must consider several factors to ensure the best possible outcome. Choosing the right location in our backyard is the first crucial step. Let's explore a few key considerations to create the perfect pizza-making haven.

First, we should determine whether our pizza oven will be a standalone outdoor unit or if it will be integrated into an existing outdoor kitchen setup. This greatly impacts the spatial planning, as a countertop pizza oven can be easily incorporated into an existing design, while a standalone unit requires a designated space within the backyard.

Safety comes second. We should find an adequate distance from flammable structures or objects, such as our home, wooden fences, or nearby trees. Keeping our pizza oven safe from direct contact with fire hazards helps prevent accidents and ensures we enjoy worry-free pizza-making.

Ventilation plays a fundamental role in the overall functionality of our pizza oven, especially for outdoor structures. It guarantees that the heat and smoke produced by the baking process don't cause discomfort or become overwhelming. Therefore, we should avoid confined spaces and direct any smoke towards a clear opening or a nearby ventilation system.

Accessibility and convenience are crucial to maximizing our pizza-making experience. We need easy access to our pizza oven and a comfortable workspace, such as a countertop for preparing and cutting ingredients. Additionally, having practical storage solutions for wood, pizza peel, and other essential tools within close proximity makes the process more enjoyable.

Lastly, don't forget about lighting. Since we may be using our pizza oven during both day and night, strategically placed lighting helps in providing sufficient visibility for preparing, baking, and serving the pizza. We can include a mix of ambient, task, and decorative lights to not only illuminate the space but also create a cozy atmosphere.

By thoroughly planning the space and addressing these essential factors, we set the foundation for a successful DIY pizza oven endeavor. Whether we opt for a standalone oven in the backyard or a countertop version in our outdoor kitchen, giving careful thought to the location and surrounding environment greatly enhances our cooking experience and ensures safe, satisfying pizza adventures.

Designing the Base

When building a DIY pizza oven, the foundation plays a crucial role in the overall stability and performance of the oven. We'll guide you on how to design a strong and efficient base for your homemade pizza oven, ensuring your masterpiece stands the test of time.

First and foremost, the materials we use for constructing the base are essential. Concrete blocks and cinder blocks are two popular options due to their durability and affordability. Not only do these provide a solid foundation, but they also offer great support for the weight of the oven. Depending on the size and design of your oven, you may also choose to use plywood for creating a formwork in which to pour the concrete.

To begin, prepare a level surface for your base. Excavate the area if necessary and lay down a layer of compacted gravel or crushed stone. This will provide stability and proper drainage for your pizza oven base. Next, create a concrete slab or use concrete blocks to form the perimeter of the base. It's essential to ensure that the base is level and has a strong footing for supporting the oven's weight.

Incorporating insulation within the base is also an important consideration. This can be achieved by mixing insulation material, such as perlite or vermiculite, into the concrete mixture. Alternatively, you can use insulating pavers on top of the concrete slab. By properly insulating the base, we minimize heat loss, resulting in a more efficient oven.

Once you've laid the foundation and insulation, it's time to add the floor for your pizza oven. Use fire bricks or other heat-resistant materials to create a flat, durable surface that can withstand the high temperatures generated by your oven. These bricks should be secured with refractory mortar, ensuring a strong and long-lasting floor.

By keeping these key aspects in mind and employing the right materials and techniques, we can create a reliable and efficient base for our DIY pizza oven. With a well-designed base in place, we can confidently move forward with constructing the rest of our pizza oven, knowing its foundation is secure and durable.

Creating the Oven Structure

When building a DIY pizza oven, the most critical aspect is the oven structure itself, ensuring it's built using the appropriate materials and technique. In this section, we will cover some essential steps to consider while creating the oven structure.

First, let's discuss the materials needed to build a durable and well-insulated brick pizza oven. While there are various materials available, we recommend using fire- or heat-resistant bricks. These bricks can withstand the high temperatures generated by a wood-fired pizza oven. In addition to bricks, you will also need mortar specifically designed for high temperatures, as it is vital to the structural integrity of the oven and its ability to handle heat.

Now that we have our bricks and mortar ready, it's time to begin the assembly process. As a first step, we need to create a strong base for our outdoor pizza oven. The base needs to support the oven's weight and provide insulation, which will determine how efficiently it operates. A solid foundation usually consists of a reinforced concrete slab; however, there are alternative materials and methods available, depending on your preferences and budget.

Once the base is built and cured, we can start laying the bricks for the oven structure. The first layer, also known as the oven floor, is where we will be placing the pizza directly. This layer should be made using bricks with a smooth surface, as it will allow for even heat distribution and make it easier to slide pizzas in and out. Ensure the bricks are appropriately leveled to avoid any heat-loss through gaps or uneven surfaces.

After the oven floor is complete, it's time to format the dome. To do this, we need a precise measurement and plan for the shape and size of the dome. Some wood-fired pizza oven kits provide pre-designed plans, while others offer a customizable design that you can modify to suit your space requirements. When constructing this part of the oven, ensure that the bricks fit tightly together in a circular pattern and are adequately supported in their respective positions.

During the dome construction, it's vital to remember to leave a viewport or an opening for the smoke and heat to escape. This opening, known as a flue or chimney, needs to be carefully planned and built so that the flames can adequately manage the heat and smoke.

Building your own DIY pizza oven can be a rewarding process if done correctly. By following these essential steps and using suitable materials, you can create a durable and efficient brick pizza oven that will serve you and your family for years to come.

Insulating the Oven

When building a DIY pizza oven kit, one essential step is insulating the oven. Insulating our oven helps retain heat, ensuring an even cooking temperature and reducing fuel consumption. Various materials can be used for insulation, including vermiculite, ceramic fiber insulation, or perlite. Let's discuss these materials in detail.

Vermiculite is a popular choice for DIY ovens due to its affordability and availability. This lightweight, fire-resistant mineral provides excellent insulation, allowing our oven to maintain consistent temperatures for prolonged periods. We can apply vermiculite as loose fill or mix it with cement to create a vermiculite concrete layer. When using vermiculite, it's crucial to leave a 3" to 4" space around the oven for even insulation.

Another option is ceramic fiber insulation, known for its superior heat retention properties. Though more expensive than vermiculite, ceramic fiber blankets or boards are effective in insulating our pizza oven, resulting in better heat management. To install, we can simply wrap the ceramic fiber blanket around the oven or attach the boards to the oven's exterior.

Alternatively, perlite is another insulation option, sharing similarities with vermiculite. Lightweight and fire-resistant, perlite can be applied in the same manner as vermiculite, as a loose fill or mixed with cement. Whichever insulation material we choose, it should be able to encase the oven evenly and improve heat retention.

When insulating our pizza oven, it's essential to pay attention to the oven's base as well. The hearth or oven floor should be made of fire bricks, which offer excellent heat resistance and durability. We can further insulate the oven floor by placing perlite or vermiculite layers underneath the fire bricks.

In addition to insulation materials, we need to consider reinforcement methods for our pizza oven. One such method involves wrapping wire mesh or chicken wire around the oven, which helps hold the insulation in place and provides structural support.

Taking the time to properly insulate our pizza oven ensures a high-functioning and efficient cooking experience. With the right materials and installation techniques, we can enjoy delicious wood-fired pizza that rivals our favorite pizzerias.

Building the Chimney

When constructing a chimney for our DIY pizza oven, it is essential to follow the proper steps and use the right materials. This will ensure the finished chimney is safe, efficient, and durable.

To begin, let's choose the bricks needed for our chimney. Using fire bricks for the inner surface of the chimney is crucial as they can withstand high temperatures. Select bricks which can handle temperatures up to 2,700 degrees Fahrenheit. For the outer surface, we can use standard bricks to match the appearance of the rest of the oven. Make sure the bricks are all clean and free of any cracks or damage.

Now, let's move on to the mortar. A refractory mortar is preferred due to its specialized formula designed for use in high-temperature applications. This type of mortar is available at most hardware stores and should be mixed according to the manufacturer's instructions. Remember, proper consistency is important to avoid excessive heat transfer or energy loss.

To start the chimney construction, place the first layer of bricks on the pizza oven base. Make sure the bricks are evenly spaced and leveled for a sturdy foundation. Spread the refractory mortar onto the bricks using a small trowel, covering the entire surface evenly. Place the next layer of bricks in the mortar, staggering the alignment to create a secure and stable structure.

As we continue adding layers, it's a good idea to periodically check if the bricks are straight and level. A simple way to do this is by using a level or a straight edge. Continue building the chimney upward, maintaining proper brick spacing and consistency in applying the mortar.

One important consideration in the chimney design is the flue. The flue is a crucial element that directs smoke and gases from the oven out through the chimney, helping maintain a healthy, smoke-free cooking environment. To ensure proper venting, we recommend installing an appropriately sized flue liner within the chimney.

Remember that patience is crucial during this process. Allow ample time for the mortar to dry between each stage of construction. Following these steps will result in a functional and durable chimney that complements our DIY pizza oven and enhances the overall outdoor cooking experience.

Finishing the Oven

Once we've built our oven base and have started on the structure, it's important to focus on finishing the oven properly. This will ensure it functions efficiently and lasts a long time. In this section, we'll discuss the materials and steps needed to finish the oven, including cement, rebar, clay, and mortar.

Before starting the finishing process, we want to make sure that the base structure is properly reinforced. To achieve this, we can use rebar to create a solid support system. Rebar should be placed around the perimeter of the base, vertically, and tied together in a grid pattern for added stability.

Next, let's discuss the role of cement in finishing our oven. We will use it to create a stable floor for our pizza oven. To do this, mix the cement according to the manufacturer's instructions, then pour it over the rebar and oven base to form a level surface. Allow the cement to cure for at least 24 hours before proceeding.

After our cement floor has set, it's time to begin work on the oven walls and dome. This is where mason expertise becomes essential. Using firebricks and refractory mortar, we will carefully construct the walls and dome, ensuring that they are even and well-insulated.

Now, let's talk about clay. Clay can be a key element in creating the ideal cooking environment within our DIY pizza oven. We can mix our own clay or purchase pre-mixed options from a local supplier. Either way, we'll need to apply a layer of clay to the surface of the firebrick walls and dome. We can start by mixing the clay with sand, straw, or sawdust, then spreading that over the surface of the dome, making sure to blend it in while avoiding air pockets or thin spots. This layer of clay will help insulate the oven and maintain a consistent cooking temperature.

Lastly, it's time to apply the mortar to create a smooth, sealed exterior for the oven. We will use a special high-temperature mortar that can withstand the heat generated in our pizza oven. Mix the mortar according to the manufacturer's instructions, then apply it over the outer clay layer, using a trowel to smooth and finish it evenly.

After allowing the mortar to cure, our DIY pizza oven is complete and ready for use! Remember to routinely inspect the oven, checking for cracks or signs of degradation, and address any issues as needed to ensure a long-lasting and functional pizza oven.

Using Your Pizza Oven

Building a pizza oven in your backyard can be an enjoyable project, allowing you to host amazing pizza parties and improve your outdoor cooking experience. The first step in this process is to decide on the type of oven that works best for you. There are different options, such as a wood-fired pizza oven or a gas-fueled oven. Both have their advantages and can create delicious results.

Typically, a wood-fired oven is ideal for the traditional Neapolitan-style pizza, as it provides authentic smoky flavor combined with high heat. The oven can also be used as a bread oven, enabling you to bake artisanal loaves and other treats. However, these ovens may require more time to heat up and need some skill in managing the fire. On the other hand, gas-fueled ovens heat up faster and are easier to control, but they might lack some of the wood-fired ovens' authentic charm.

Using the right materials while constructing your pizza oven is crucial. For instance, building a brick oven pizza requires fire bricks, as they are designed to handle the high temperatures generated within the oven. You might also consider using a pizza stone, which distributes heat evenly and helps achieve that perfect crisp crust and chewy center on your pizzas.

And when it's time to use your newly-built pizza oven, heat is everything. Ensuring that your oven reaches the optimal temperature (usually around 800°F for wood-fired ovens) is essential for creating restaurant-quality pizzas with the perfect crust and deliciously melded toppings. Keep in mind that outdoor cooking can be affected by various factors such as ambient temperature and wind, so constant monitoring and adjustments might be necessary.

Finally, remember that practice makes perfect. Experiment with various dough recipes, oven temperatures, and cooking times to find the ideal combination for your backyard pizza oven. With time, you'll undoubtedly impress your family and friends with your delicious brick oven pizza creations, turning your outdoor gatherings into unforgettable pizza parties.

DIY Pizza Oven Tutorials

Constructing a DIY pizza oven can be an exciting and enjoyable project when you have the right guidance and resources. While there are numerous tutorials available, we've gathered some suggestions to assist you in finding the perfect one for your needs.

We recommend checking out Bella Bacinos' collection of 30 free DIY pizza oven ideas. This compilation offers a range of designs, from simple to complex builds, catering to various skill levels in construction. For instance, one option is the Oil Drum Pizza Oven, which requires minimal materials such as an oil drum, vermiculite, cement, and fire bricks.

If you're on a budget, don't worry. You can create an impressive DIY pizza oven for less than $100 with resources mostly available at your local hardware store. Dwell's guide demonstrates how to build a minimal pop-up pizza oven in just 30 minutes. This tutorial, brought to you by a home-improvement expert, also shares valuable advice on avoiding typical pitfalls during the building process.

For a more visual and interactive experience, this YouTube video walks you through constructing a wood-fired pizza oven, using affordable materials and simple tools. The step-by-step tutorial ensures you don't miss any crucial details while building your own backyard pizza haven.

If you're looking for a written tutorial with diagrams and images, Instructables.com provides a comprehensive guide on creating a homemade pizza oven. This tutorial takes you through each step, from preparing the materials to crafting the floor of the oven - all while ensuring you achieve a smooth, professional finish.

Finally, for those who appreciate a more detailed visual representation, this YouTube instructional video documents a DIY pizza oven construction from start to finish. Although the builder is not a professional tradesman, their experience and clear video demonstrations provide valuable insights for fellow enthusiasts.

Embarking on your DIY pizza oven journey can be fun and rewarding. With the resources we've highlighted, you'll be well on your way to creating a fantastic outdoor cooking space, perfect for entertaining family and friends. Happy building!

Popular Pizza Oven Designs

When we think about pizza ovens, several popular designs come to mind. Each design has its advantages which cater to different needs and preferences. In this section, we will explore some of the most popular pizza oven designs.

One popular design is the wood-fired pizza oven. These ovens use wood as their primary fuel source, resulting in a unique smoky flavor that many people love. A wood-fired oven typically has a dome-shaped design with a thick layer of insulation. This structure allows for high heat retention, making it perfect for cooking not only pizzas but also various types of breads. You can find many DIY wood-fired pizza oven ideas available for those who prefer to build one themselves.

Outdoor cooking enthusiasts often opt for a pizza oven as part of their outdoor kitchen setup. Integrating a pizza oven into your outdoor space enhances the overall cooking experience and provides a fun activity for family and friends. An outdoor pizza oven can vary from a simple, rustic design to a more elaborate structure with additional features like built-in countertops and storage.

The portable pizza oven is an excellent option for those who require flexibility. These lightweight and compact units are perfect for taking along on picnics, camping trips, or to a friend's backyard. Most portable pizza ovens are gas-powered and can heat up quickly, allowing you to cook delicious pizzas with minimal fuss. The trade-off is typically a lower cooking temperature than traditional wood-fired ovens, but they are still capable of producing great-tasting pizzas.

Bread enthusiasts may prefer a bread oven design which is specifically tailored for baking breads. Bread ovens are similar to pizza ovens in terms of structure; however, they often have a more extensive capacity and are designed to provide a more even distribution of heat. This uniform heat ensures crusty, well-risen loaves of bread. A bread oven can also double as a pizza oven, providing added versatility.

Finally, the classic brick oven pizza design is a fan favorite. Made from bricks, these ovens can withstand extremely high temperatures and retain heat for extended periods. With their excellent heat distribution, they are perfect for creating crispy, evenly cooked pizzas. You can find numerous DIY brick pizza oven plans to help you build your own.

In summary, various pizza oven designs cater to different preferences, ranging from wood-fired to portable options. Whether your priority is flavor, convenience, or versatility, there is a pizza oven design out there to suit your needs.

Choosing the Right Tools

When building a DIY pizza oven, it's essential to select the right tools for the job. One key tool to have on hand is a trowel. This versatile instrument is perfect for spreading mortar evenly on bricks while constructing the oven. In addition to the trowel, a few other tools will make the process smooth and efficient.

First, we need a solid pizza peel. A pizza peel allows us to effortlessly slide pizzas in and out of the oven. We recommend choosing one made from aluminum with a heat-resistant steel handle, such as the one featured on Firewalker Ovens.

To ensure even heating, an ash rake comes in handy. This tool aids in moving wood around as the oven warms up. As described on The Family Handyman, when the oven reaches the ideal temperature, the ash rake is also useful for pushing wood and cinders aside to expose the hot cooking surface.

The construction process itself requires some specialized tools as well. For cutting bricks or other materials, you may need angle grinders with cut-off wheels or circular saw blades designed for metal. As mentioned in Popular Mechanics, be cautious when using cutting tools on stainless steel, as some may heat up and cause issues.

In summary, our DIY pizza oven toolkit should include a trowel, pizza peel, ash rake, and various cutting tools. Equipped with these essentials, we'll be on our way to creating and enjoying delicious homemade pizzas.

Frequently Asked Questions

What materials are needed for a DIY pizza oven?

To build your own pizza oven, you'll need a variety of materials, including firebricks, mortar, cement, insulation, and steel reinforcement. Additionally, you'll need an oven door, a chimney, and a base to support the oven's weight. It's essential to choose materials that can withstand high temperatures and provide proper insulation to maintain the heat within the oven.

How do you construct a wood-fired pizza oven?

Constructing a wood-fired pizza oven involves several steps. First, prepare a strong and level base to support the oven. Then, build the oven floor using firebricks and mortar. Next, construct the oven's dome by carefully layering firebricks in a circular pattern, using mortar to hold them together. Install a chimney to ensure proper ventilation and airflow. Finally, add insulation around the oven's dome and floor to retain heat, using materials such as ceramic fiber blanket and perlite.

What are the key steps to building an outdoor pizza oven?

Here are the key steps to build an outdoor pizza oven:

  1. Plan the desired size, shape, and location of your oven.
  2. Construct a sturdy and level base to support the oven's weight.
  3. Build the oven floor and dome, using firebricks and high-temperature mortar.
  4. Install a chimney to facilitate proper ventilation and smoke extraction.
  5. Add insulation around the oven's dome and floor for efficient heat retention.
  6. Finish the exterior with a durable, weather-resistant material.

Can you use cinder blocks or normal bricks to build a pizza oven?

While it's possible to use cinder blocks or normal bricks for the base or support structure of a pizza oven, using firebricks for the oven's floor and dome is highly recommended. Firebricks are specifically designed to withstand high temperatures and provide better heat retention compared to regular bricks or cinder blocks.

Is building your own pizza oven more cost-effective?

Yes, building your own pizza oven can be more cost-effective compared to purchasing a pre-made oven. By carefully sourcing the materials and doing the labor yourself, you can save a significant amount on installation costs. However, it's important to consider the time and effort required to build your own pizza oven, as well as the potential learning curve if you're inexperienced with construction.

What tools are required for assembling a brick pizza oven?

Assembling a brick pizza oven requires various tools such as a trowel, bricklaying tools, a level, a hammer, a saw, and a measuring tape. You might also need steel reinforcement, a concrete mixer, and a wheelbarrow for mixing and transporting materials during the construction process. Safety gear like gloves and a dust mask is essential to protect yourself while working.